.Net core MVC project structure explained step by step part 1
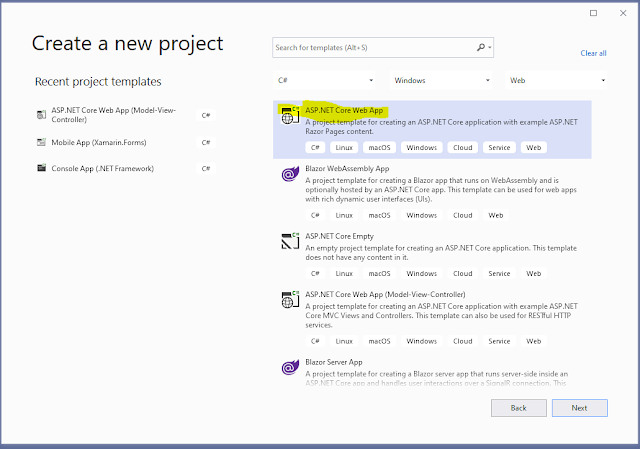
To understand the .net core project structure we need to create the new MVC application. for that go to file menu and click on create a new project menu. select the Asp .net core web app template from the popup window as shown below.
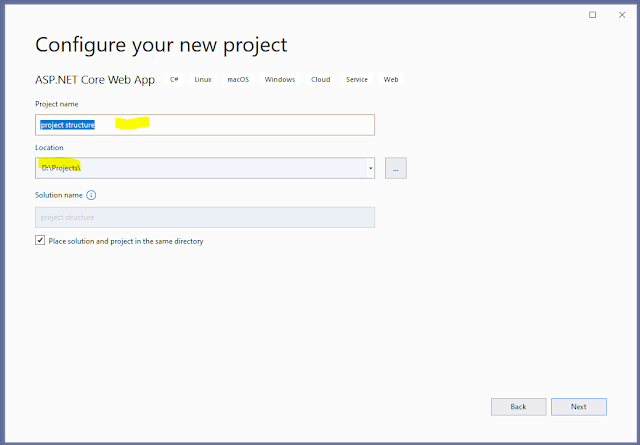
Then click on next button and provide application name you want to create the project for and select the appropriate location where you want to create the project and click on next button as shown in below image.
in next screen you can select the target framework and click on create button as shown below image.Now right click on solution explorer and click on manage nuget package option and add any package you are going to use in the application. In my case i have installed the Nlog package in the sample project. below is the glimpse of my solution in the image.
so in solution explorer above you can see that there is dependencies section where following are the project dependency categories.
Frameworks: The framework category contain the information about the dot net core runtime libraries is being used for running the project.
Package: The package contains about the list of nuget packages is installed in the project.
Projects: The project not shows the direct other project reference to the project.
What Next, check the part 2 of the article for detailed explanation.
.Net core MVC project structure explained step by step part 2


Comments
Post a Comment