
Implement Nlog in .Net core MVC application part 1
Logging is a very important part of the enterprise application/web application. Setting up the logging correctly not only beneficial for long term maintenance of the application but also it is useful tool to find out the RCA in case of mission critical bug arises. Therefor we will going to discuss the various logging technique implementation using Nlog library package. In this article we will going to use .net core application for demonstration but you can implement it in .net framework application also.
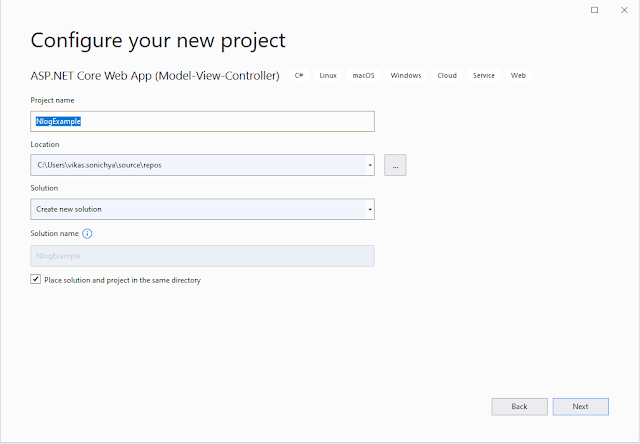
So lets start the implementation of Nlog in .net core MVC application. Open visual studio 2019/17 and create the new project as shown below.


- NLog version 4.7.13
- NLog.Extensions.Logging version 1.7.4
- NLog.Web.AspNetCore version 4.14.0

 using Microsoft.AspNetCore.Hosting;
 using Microsoft.Extensions.Hosting;
 using NLog.Web;
 namespace NlogExample
 {
   public class Program
   {
     public static void Main(string[] args)
     {
       CreateHostBuilder(args).Build().Run();
     }
     public static IHostBuilder CreateHostBuilder(string[] args) =>
       Host.CreateDefaultBuilder(args)
         .ConfigureWebHostDefaults(webBuilder =>
         {
           webBuilder.UseStartup<Startup>();
         })
        .UseNLog();
   }
 }
ILoggerManager.cs file
 using System;
 namespace NlogExample.NlogHelper
 {
   public interface ILoggerManager
   {
     void LogError(string ErrorMessage);
     void LogError(Exception ex, string ErrorMessage);
     void LogTrace(string ErrorMessage);
     void LogDebug(string ErrorMessage);
     void LogInfo(string ErrorMessage);
   }
 }
LoggerManager.cs file
 using NLog;
 using System;
 namespace NlogExample.NlogHelper
 {
   public class LoggerManager: ILoggerManager
   {
     Logger log = NLog.LogManager.GetLogger("ErrorLogFile");
     public void LogError(string ErrorMessage)
     {
       log.Error(ErrorMessage);
     }
     public void LogError(Exception ex,string ErrorMessage)
     {
       log.Error(ex, ErrorMessage);
     }
     public void LogInfo(string ErrorMessage)
     {
       log.Info(ErrorMessage);
     }
     public void LogDebug(string ErrorMessage)
     {
       log.Debug(ErrorMessage);
     }
     public void LogTrace(string ErrorMessage)
     {
       log.Trace(ErrorMessage);
     }
   }
 }
Now we need to register ILoggerManager service with the concrete type LoggerManager As singleton lifetime in startup.cs file as shown below.
 using Microsoft.AspNetCore.Builder;
 using Microsoft.AspNetCore.Hosting;
 using Microsoft.Extensions.Configuration;
 using Microsoft.Extensions.DependencyInjection;
 using Microsoft.Extensions.Hosting;
 using NlogExample.NlogHelper;
 namespace NlogExample
 {
   public class Startup
   {
     public Startup(IConfiguration configuration)
     {
       Configuration = configuration;
     }
     public IConfiguration Configuration { get; }
     // This method gets called by the runtime. Use this method to add services to the container.
     public void ConfigureServices(IServiceCollection services)
     {
       services.AddControllersWithViews();
       services.AddSingleton<ILoggerManager, LoggerManager>();
     }
     // This method gets called by the runtime. Use this method to configure the HTTP request pipeline.
     public void Configure(IApplicationBuilder app, IWebHostEnvironment env)
     {
       if (env.IsDevelopment())
       {
         app.UseDeveloperExceptionPage();
       }
       else
       {
         app.UseExceptionHandler("/Home/Error");
         // The default HSTS value is 30 days. You may want to change this for production scenarios, see https://aka.ms/aspnetcore-hsts.
         app.UseHsts();
       }
       app.UseHttpsRedirection();
       app.UseStaticFiles();
       app.UseRouting();
       app.UseAuthorization();
       app.UseEndpoints(endpoints =>
       {
         endpoints.MapControllerRoute(
           name: "default",
           pattern: "{controller=Home}/{action=Index}/{id?}");
       });
     }
   }
 }
Now Next step is configure Nlog.Config file.
 <?xml version="1.0" encoding="utf-8" ?>
 <nlog xmlns="http://www.nlog-project.org/schemas/NLog.xsd"
    xmlns:xsi="http://www.w3.org/2001/XMLSchema-instance"
    xsi:schemaLocation="http://www.nlog-project.org/schemas/NLog.xsd NLog.xsd"
    autoReload="true"
    throwExceptions="false"
    internalLogLevel="Off" internalLogFile="c:\temp\nlog-internal.log">
  <variable name="myvar" value="myvalue"/>
  <targets>
   <target xsi:type="File" name="logError" fileName="${basedir}/logs/${shortdate}.log"
       layout="${longdate} ${uppercase:${level}} ${message}" />
  </targets>
  <rules>
   <logger name="ErrorLogFile" minlevel="Debug" writeTo="logError" />
  </rules>
 </nlog>
Now all required configuration for Nlog Logging is done now we can use the logging mechanism in our example. Go to solution expolrer >> controller and open HomeController.cs file and below code.
 using Microsoft.AspNetCore.Mvc;
 using NlogExample.Models;
 using NlogExample.NlogHelper;
 using System;
 using System.Diagnostics;
 namespace NlogExample.Controllers
 {
   public class HomeController : Controller
   {
     private readonly ILoggerManager _logger;
     public HomeController(ILoggerManager logger)
     {
       _logger = logger;
     }
     public IActionResult Index()
     {
       _logger.LogInfo("In Index");
       try
       {
         _logger.LogDebug("In Index");
         int i = 0;
         _logger.LogTrace("value of i="+i);
         var output = 75 / i;
         _logger.LogDebug("out Index");
       }
       catch (Exception ex)
       {
         _logger.LogError("this is sample error without exception");
         _logger.LogError(ex, "this is sample error with exception");
       }
       return View();
     }
     public IActionResult Privacy()
     {
       return View();
     }
     [ResponseCache(Duration = 0, Location = ResponseCacheLocation.None, NoStore = true)]
     public IActionResult Error()
     {
       return View(new ErrorViewModel { RequestId = Activity.Current?.Id ?? HttpContext.TraceIdentifier });
     }
   }
 }
Now run the application and you would see the below output.

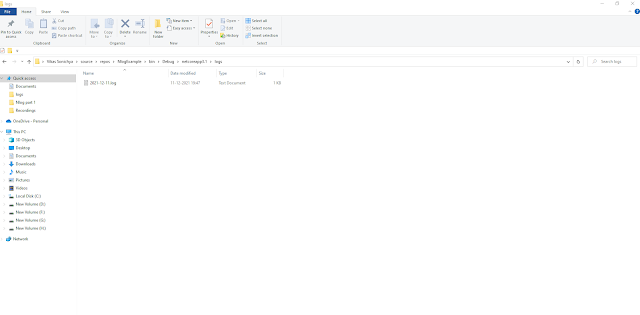
Go to projects bin directory you can file the log file created automatically by Nlog like below screens.

What Next, Learn how to write logs in csv file using NLog in below article.
Implement Logging in CSV file using Nlog in .net core MVC application- part 2


Comments
Post a Comment