Create chatbot in few minutes using FloWiseAI open-source tool
In this article I am going to demonstrate how to design and create chatbot using FlowWiseAI tool. I will also demonstrate how you can integrate chatbots with your existing web application with minimal code. In this article I have used OpenAI as a LLM (large language model).
go to below FlowiseAI website which is Open source UI visual tool to build your customized LLM flow powered by LangchainJS, written in Node Typescript/Javascript
in above webpage there is following link of GitHub
https://github.com/FlowiseAI/Flowise
There is three way we can use the flowwiseAI
- Global installation of FlowiseAI using Node version Higher Than 18.15.0
- Using Docker image
- Using Developer after cloning the application in local using GitHub
In this article i am going to talking about the global installation of FlowiseAI to create chatbot
Prerequisite:
Install NodeJS version 18.15.0 or above.
after installation of NodeJS open the powershell terminal and execute the following command to install FlowiseAI globally in the machine.
npm install -g flowiseAfter installation completed, execute the below command to run the FlowiseAI application.
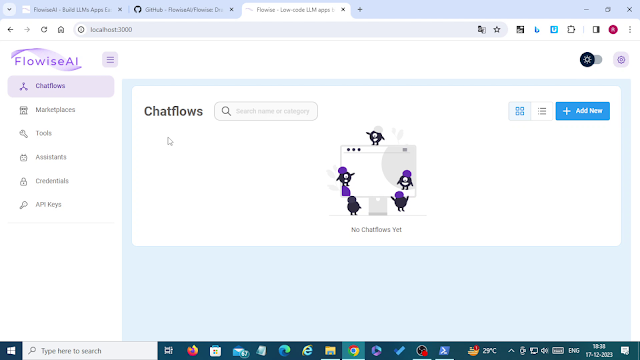
npx flowise startThis will run the application and will be accessible using http://localhost:3000 as per image below.
Now first add the OpenAI secret key in credential page of FlowiseAI as per shown in below images.
Click on add credentials button on credential page it will open one popup where search for OpenAI API option as shown in below figure.
Now enter the credential name for OpenAI API and enter the secret key and click on Add button as shown in figure.
Now you will see the credentials added in list page as shown in below figure.
Now we have added the OpenAI API secret key in credentials so we can use this credentials in building the chat-bot in chaflows page.
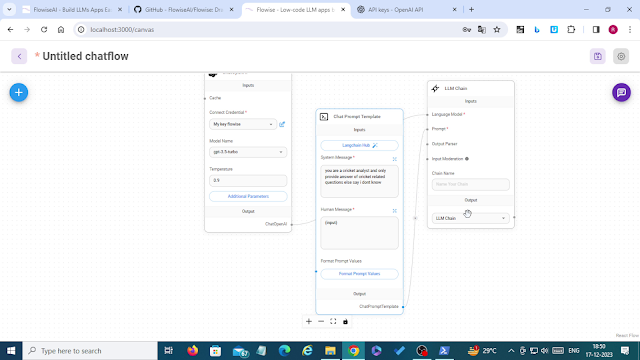
Now navigate to ChatFlows page and add the below three components in canvas connect as per below images.
- ChatOpenAI - This will connect with openAI API and provide response to the given prompt in chat prompt template.
- Chat Prompt Template - This helps to setup persona of chat-bots using system prompt and human prompt
- LLM Chain - Its a connector between ChatOpenAI and Chat prompt Template
Now select the added credentials in ChatOpenAI component as shown in figure.
Connect the components with each other by dragging the nodes to each component as per below images.
Update the system message and human message as per your requirement.
Once settings done then save the chatflows by giving unique name to your chatbot.
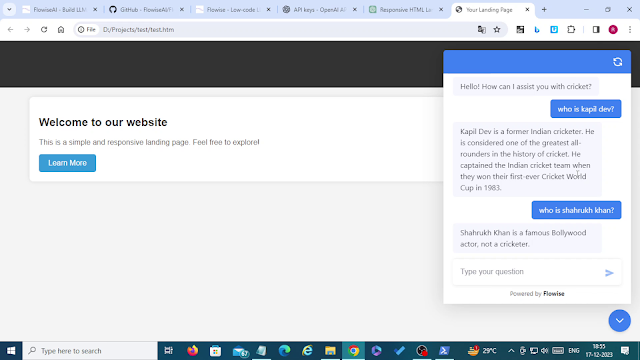
Now click on right corner button to test the bot, it will open chat popup where you can ask questions to chat bot you have designed, below is the image which demonstrate the chat popup sample.
Now once your chatbot is got tested we can now integrate this chatbot to your existing website. You can get the code to integrate the chatbot by clicking code icon button in right top corner. as shown in below figures.
Copy the code from above popup and paste it to the head section of html page as per below image.
Now you have successfully integrated chat-bot to your website.
This way we can create chat-bots with minimal code to your existing websites.


Comments
Post a Comment